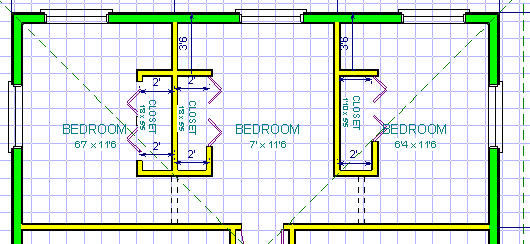
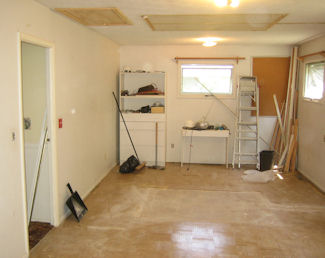
 When
we came to Berea, our home was the parish Rectory. It was advertised as
having five bedrooms, but three of them were very small, set across the
back of the house in what the architect's plans called a "dormitory"
(see drawing, right). The boys used these as bedroom/play areas (Andrew
on the left; Paul on the right; the center room as a common play area.
It was cramped and not very comfortable, but it did have desks next to
the closets and I put in shelves above the desks.
When
we came to Berea, our home was the parish Rectory. It was advertised as
having five bedrooms, but three of them were very small, set across the
back of the house in what the architect's plans called a "dormitory"
(see drawing, right). The boys used these as bedroom/play areas (Andrew
on the left; Paul on the right; the center room as a common play area.
It was cramped and not very comfortable, but it did have desks next to
the closets and I put in shelves above the desks.
The beds were eventually put along the top wall in the drawing (the south wall of the house in real life), and the desks were no longer accessible; the space beneath them became known as "The Black Hole of Calcutta," a reference I doubt the boys "get" even to this day!
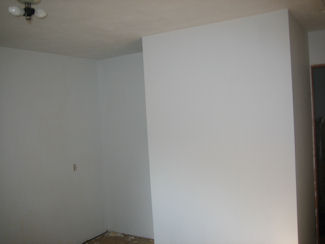
Once the boys were out on their own, we began thinking about what might be done to put these spaces to better use. The obvious solution was to turn the three tiny bedrooms into two decent-size ones, which Penney and I could use as studies/hobby rooms. This would free up the room we currently use (jointly) for those purposes, which could then revert to being a guest bedroom.
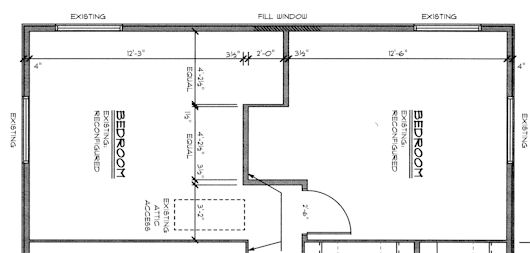 We
decided to consult an architect, whose drawing for the revised "dorm"
is shown at the right. Each room will have a closet and Penney's Study
(on the left in the drawing to the right) has an overhead attic-access
pulldown stair which Andrew and I installed last year. This precludes
a separate door for Penney's study, so we decided to leave the original
door where it is, where it will function as her door. Bob's study has
its own door.
We
decided to consult an architect, whose drawing for the revised "dorm"
is shown at the right. Each room will have a closet and Penney's Study
(on the left in the drawing to the right) has an overhead attic-access
pulldown stair which Andrew and I installed last year. This precludes
a separate door for Penney's study, so we decided to leave the original
door where it is, where it will function as her door. Bob's study has
its own door.
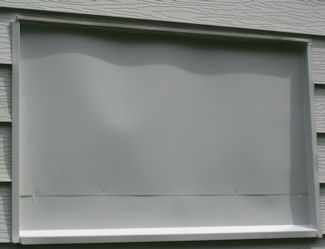
The architect's plans call for the filling in of the center window (the one in the former "toy room." This has proven to be a bit of a problem, since we haven't, yet, figured out a good way to do this. Suggestions have ranged from leaving it in place and building the new partition wall against it (rejected out-of-hand) and installing a kind of "drip guard" on the outside (ditto). It looks as though we'll be hiring a contractor for that part of the job. . . as Andrew put it: "There's probably a lot of ways to do this, and you want to pick one that's right." (See below.)
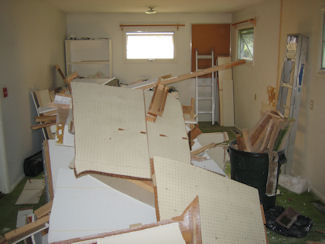
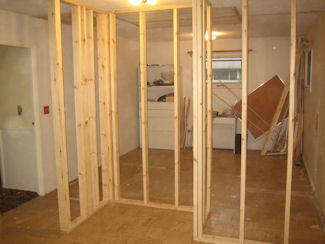
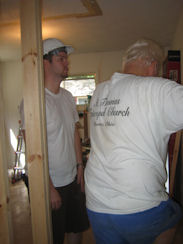
The first rule in any remodeling project is "destruction before construction." So, for the first and last time, I asked the boys to trash their rooms!
Paul was off on a mission trip to Harlan, Kentucky, rehabbing homes with a group from his church, but Andrew was happy to come and help lend a hand. It's a true joy to work with him: his attitudes are the same as mine: "Do it right." Between a reciprocating saw and a sledge hammer, we made fairly short work of the existing closets, which was really the only tear-down we needed to do. Various stages are shown below.
By chance, a house in the neighborhood is being "flipped" by a couple who also live in the neighborhood. They are doing a really magnificent job, and happened to have a Dumpster in the drive of the house being rehabbed. They didn't need all of it, and the extra room was more than enough for all of our debris so we bought a third of their Dumpster for our stuff. Talk about "win/win!" We carried the stuff out to my pickup, then trucked it across the street and down a house or two, backed it up to their Dumpster and tossed away! It took three loads.
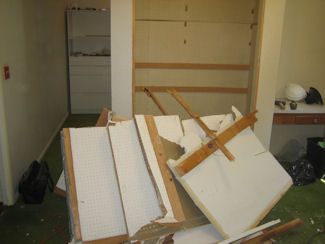
What was Paul's closet is stacked against the closets for the toy room and Andrew's room.
Here, all three closets are ready for transport to the Dumpster. It took three pickup-truck loads.
And here's the result of a day of destruction; all closets and carpeting are gone.
 The
"fun" part of projects like this is supposed to be the construction
phase, but it took quite a while for us to figure out how to read blueprints
(the difference between "rough" measurements and "finished"
ones had us buffaloed for a while, but it's really common sense once you
"get it"). We bought a Ramset tool for firing nails into the
cement slab underneath the tile, and Andrew was able to borrow a framing
nail gun from his father-in-law. Once we got the nails a local do-it-yourself
store sold us (they were the wrong ones!) un-jammed from the nail gun
(that took about an hour-and-a-half!), the job went pretty quickly.
The
"fun" part of projects like this is supposed to be the construction
phase, but it took quite a while for us to figure out how to read blueprints
(the difference between "rough" measurements and "finished"
ones had us buffaloed for a while, but it's really common sense once you
"get it"). We bought a Ramset tool for firing nails into the
cement slab underneath the tile, and Andrew was able to borrow a framing
nail gun from his father-in-law. Once we got the nails a local do-it-yourself
store sold us (they were the wrong ones!) un-jammed from the nail gun
(that took about an hour-and-a-half!), the job went pretty quickly.
You can see the results on the right. We finished just before midnight, after which Andrew had to go back home, return the nail gun rig, pack for a trip to Chicago the next day (he's finishing up his Master's degree program)and grab a few hours of sleep.
I felt bad about keeping him to late, but his help was, literally, invaluable. I couldn't have done it without him. Paul will probably be on hand to help with the drywalling!
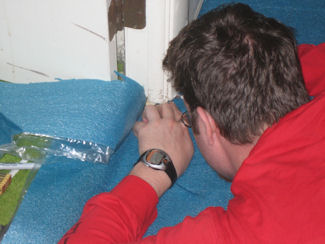
I was not anxious to mess with anything involving the integrity of the exterior wall, so I asked a local window company for the name of a contractor who could remove the center window in the old center room (which was right where the new partition wall starts) and come up with some kind of patch for it.I lucked out and was given the name of a guy who can "do it all" and has experience with the contractor who built the house.He did a really great job, as you can see from the interior (l.) and exterior (r.) views.
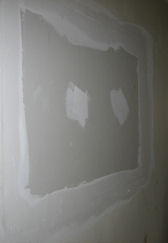
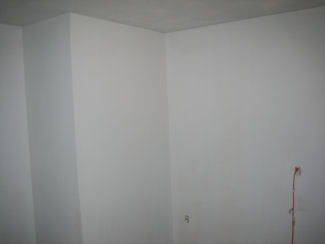
The drywall started going up on the walls pretty much as soon as we all got home from Andrew's Commencement ceremony and he'd had a chance to get his bags unpacked. It took about a day to get it all up, get the doorway into Bob's study framed and get the first coat of "mud" applied to joints and screw holes.
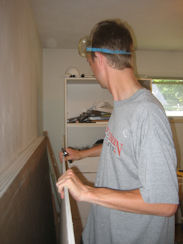
Shown to the left are Paul and Bob measuring for the door; to the right is Andrew cutting drywall (a task at which he proved expert).
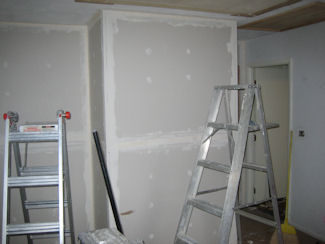
And here are the results: Shown at the left is Penney's study; to the right is Bob's. You can see the closets stand side-by-side. As of August 25th, all three coats of "mud" have been applied and the walls are ready for the final finish sanding before the "old" walls and ceiling are washed down and the primer coat of pain applied. We hope to be painting by September 1! Emily helped Bob choose the colors for his study at her (belated) "birthday dinner" on Sunday, August 31th,
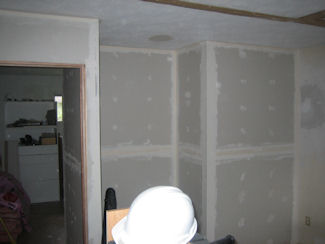
We actually beat September 1 in one way; the primer coat cut-in painting was done before Labor Day. The main portion of the primer coat went on the ceiling and walls on Tuesday, the 2nd. It showed up a few "holidays" in the drywall work on the ceiling and one wall, which will have to be fixed and re-primed before the finish coats go on, but at least the two studies (Penney's to the left; Bob's to the right) now look like actual "rooms". A Wagner "Paint Crew" machine I bought made the painting (especially the ceiling) a lot easier, but cleaning it was a 45-minute job!
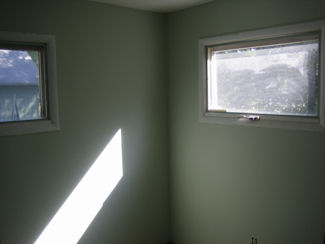
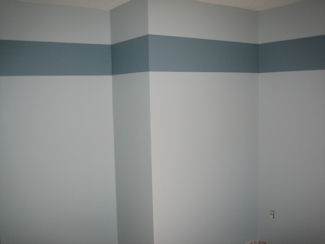
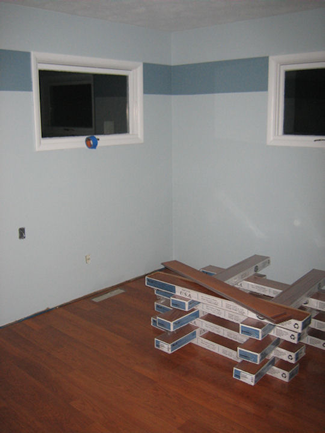
The two studies (again, Penney's to the left; Bob's to the right) with their finish coats of paint( but before Bob washed the windows!). Penney chose a light green from a palatte of historic colors; Bob chose a light blue with a darker blue stripe, also from Benjamin Moore's palette of historic colors. Bob thinks his colors remind him of the sea.
Next step: installing the flooring!

The laminate has an underlayment with vapor barrier, and the boys became experts at cutting and fitting it. (Andrew above; Paul to the far right.)
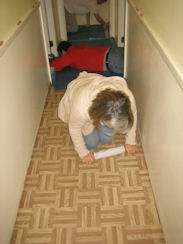
Yes, that's a rolling pin in Penney's hands, and, no, she doesn't think Bob's newly-laid tile is pie crust—she's tamping it down. Because the other rooms were tiled, we had to tile the hallway too before laying the laminate flooring so that the heights would match.
Behold! The flooring! Penney has already started moving in.
 T
T
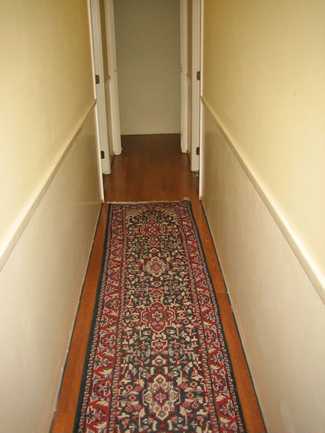
The hallway rug, bought many years ago in expectation of this day, rejoices at the demise of the brown shag carpeting!
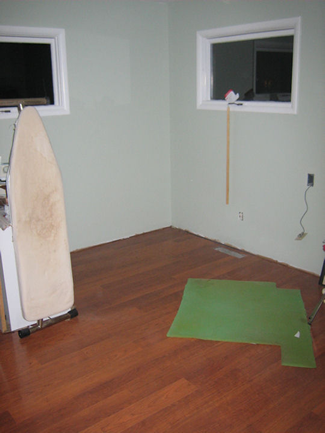
Bob's study, with the laminate for the guest-room-to-be getting acclimated to the house!
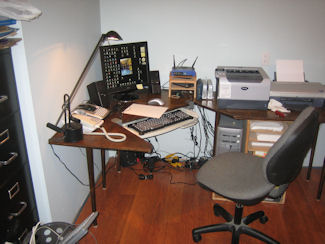
Here's the new computer station; it's about the only part of the study that's in any kind of working order! (The closet [on the left] is holding filing cabinets.)
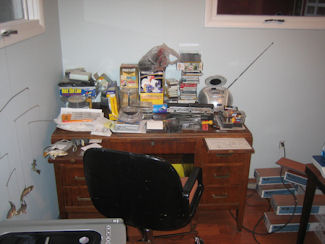
Here's the "desk" portion of the room. See what we mean?

We saved the best for last!